I resolved to do 30 techniques in September but I missed this weekend, and I don’t know if that’s a realistic goal to accomplish. Moving forward, I’m still going to show you techniques, but not necessarily one each day.
As I was looking into which one to cover next, I came across rainbow color backgrounds, and found there is not one technique but a few different ways to accomplish this. I’m going to show you three different ways I’ve found, and tell you which one I liked the best.
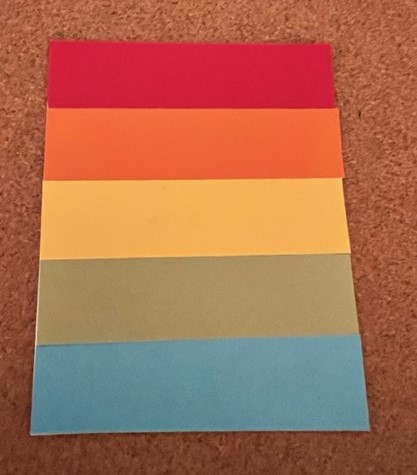
Colored Cardstock Strips
This method involves cutting colored cardstock into strips, and using that as your card front. You can choose colors and go in ROY G BIV order, or try an ombre pattern, with shades of the same color going from lighter to darker.
You will need a piece of white cardstock that measures 3 3/4″ x 5″ and five pieces of colored cardstock that measure 1″ x 4″. Cover your white cardstock with adhesive, and starting with the first color, position onto the cardstock and work you way down with the colors. Once all the strips are attached, flip it over. If there is excess hanging over the edge, simply trim it off.
For my card, I used the colors Real Red, Pumpkin Pie, Daffodil Delight, Pear Pizzazz (retired), and Tahitian Tide.
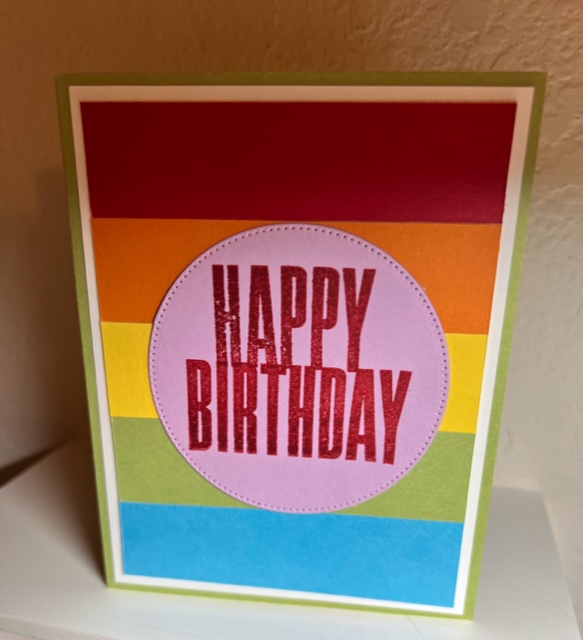
Attach this piece to a piece of white cardstock that measures 4″ x 5 1/4″, and choose a base for your card. You can pick any of the five colors you used in your strips, or think out of the box! I used Pear Pizzazz which matches my green strip on my card.
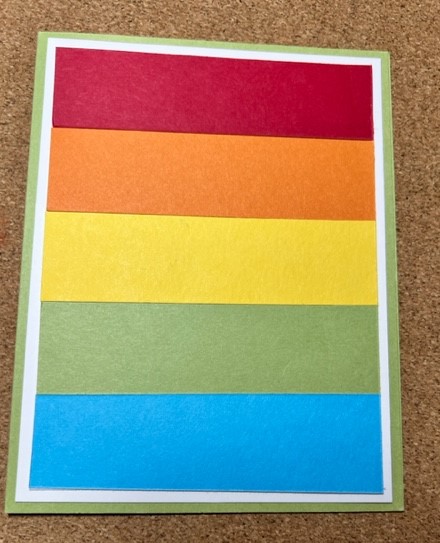
Add a greeting and you’re done! I was considering using a white circle for my sentiment, which would match the white border around the card, but used Fresh Freesia for my circle which brings a nice accent color to the front of the card and adds interest.
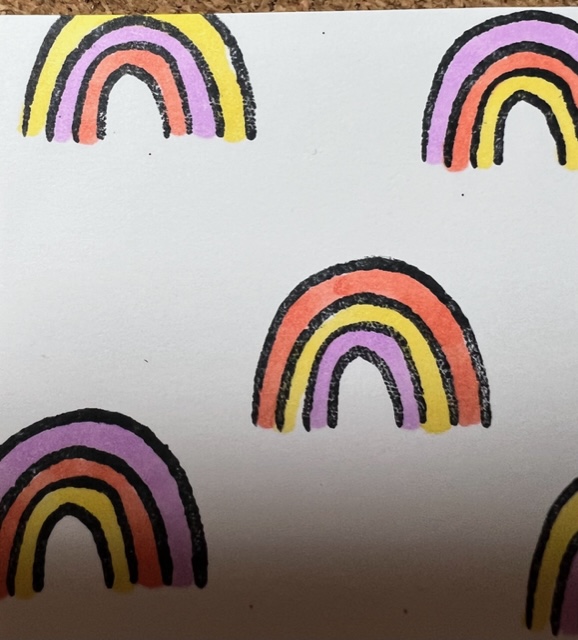
Stamped Images
You can do any smaller stamp and turn it into a rainbow background. For my example I used a contour stamp from Decorated with Happiness, which is a retired Christmas stamp set from last year. There a few stamp sets in the catalog which also include contour stamps- check out Color & Contour, Darling Details, and Oceanfront for three possibilities.
I used Flirty Flamingo, Daffodil Delight, and Pool Party for my three colors, and stamped in different colors on basic white cardstock. The image on left I stamped across in color rows, and the one of the right are alternating colors.
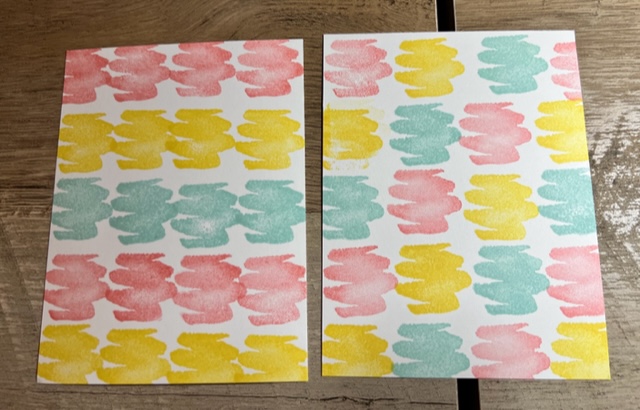
With a smaller stamp or sponge dauber, you could do it in an arced pattern, to resemble a rainbow shape. You could also use a rainbow stamp and color in the rainbow with Stampin’ Blends.
Designer Series Paper
You can use DSP to create your rainbow background! This paper is from the September – December Mini Catalog and is part of the Merry Bold and Bright collection. Even though it is Christmas paper, it absolutely works as a background for other themed cards.
This is by no means all the ways that you can make a rainbow background! Out of these three methods, using DSP is by far the easiest, but I like the stamping method the best, because it is the most fun. It always come back to stamping for me, and coloring in the rainbows using the blends was relaxing.
Let me know what idea you like best!
Happy Creating,
Jen


Leave a comment