Today’s card is inspired by Christmas DSP from a couple of years ago. Yes, really! I’ll put a picture of it below. To me, the dotted side does not really remind me of Christmas, but I do think it works well as birthday paper. What do you think? I hope you enjoy today’s card; I think it is bright and cheery!

SUPPLIES NEEDED
- A2 Card base that measures 4 1/4″ x 5 1/2*
- white cardstock for your greeting (mine measures 3″ x 2 1/4″)
- white cardstock that measures 4″ x 5 1/4″ for inside of card
- 1 1/2″ x 5 1/4″ DSP for front of card
*for card base: cut your cardstock 8.5″ x 5.5″; score at 4 1/4″
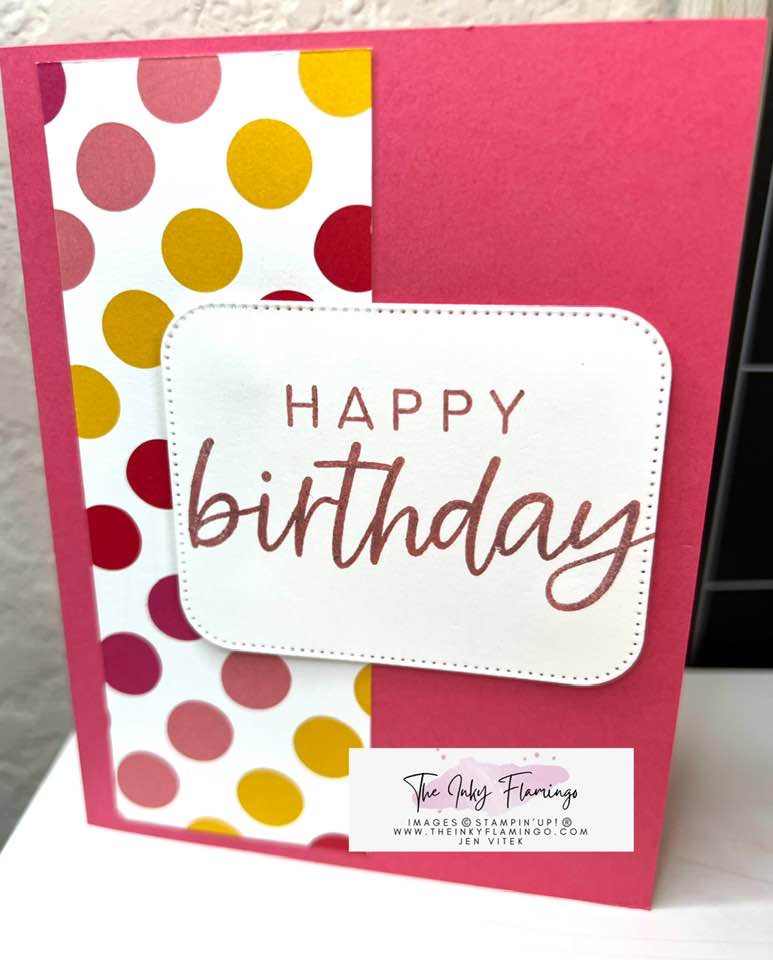
FRONT OF CARD
- Attach your DSP strip to the front of your card. Leave a gap of about 1/4″ on the left side.
- Stamp your greeting onto your white cardstock piece.
- Attach your greeting to your card with dimensionals.
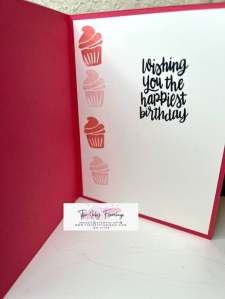
INSIDE OF CARD
- Instead of using DSP on the side of the white cardstock, I stamped a cupcake image. Ink your stamp, stamp your first image, and then without reinking, stamp your second image. It will be a lighter shade but looks as if you used two different ink colors.
- Stamp your greeting on the white cardstock.
- Attach to your card base.
SUPPLIES I USED
Feel free to use these same supplies or experiment with your own!
strawberry slush cardstock
basic white cardstock
flirty flamingo ink
With You in Mind stamp set
Happiest Day stamp set (retired)
Nested Essential Dies
Merry Bold and Bright DSP (retired)
If you like the color Strawberry Slush, it is currently 15% off in August!
The cupcake stamp is part of With You in Mind stamp set.
Videos for both Design 4 & Design 5 will be posted tomorrow here on YouTube.
I’d love to see the cards you create! Reply to this post or post your pics to social media 😉
Thanks for following along!
Jen


Leave a comment