Have you noticed that stores are starting to set up for Halloween?🎃😳
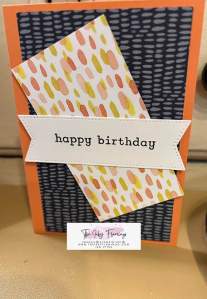
Today’s card is notecard size and versatile; you can switch it up for any occasion or holiday, and it includes a little pocket on the inside to tuck a gift card or cash. The DSP papers I used comes from the Florals in Bloom pack, and I realized the colors would work perfectly for a Halloween card if you change the greeting! If you typically only have a few trick or treaters, this might be a fun option (and maybe cheaper!) than giving out candy.
SUPPLIES NEEDED
- notecard card base that measures 3 1/2″ x 5″ *
- 1 piece of DSP that measures 3″ x 4 3/4″
- 1 coordinating piece of DSP that measures 2″ x 3.75″
- white cardstock ribbon tag that measures 1″ x 3.5″
- white cardstock piece that measures 3″ x 4 3/4″
- coordinating strip of DSP 3″ x 1 1/2″
*for card base: cut your cardstock to 5″ x 7″; score at 3 1/2″
FRONT OF CARD
1. Center & glue/tape down your DSP that measures 3″ x 4 3/4″ onto you card front
2. Attach mini dimensionals to the back of your coordinating DSP piece (2″ x 3 3/4″)
NOTE: This can be the reverse side of your DSP if it matches or choose another sheet of decorative paper.
3. Angle and attach to your card front. The mini dimensionals pop it up and give it some dimension.
4. Stamp your greeting onto your white cardstock ribbon and attach to the front of your card.
NOTE: If you do not have a die that cuts this ribbon, you can do it by hand with a scissor! Start at the bottom left corner and make a cut approximately 1/2″ towards the center. Repeat on the bottom right side, and your cuts should meet in the middle and form a ribbon end. Repeat on the other side.
INSIDE OF CARD
1. Stamp your greeting onto your white cardstock.
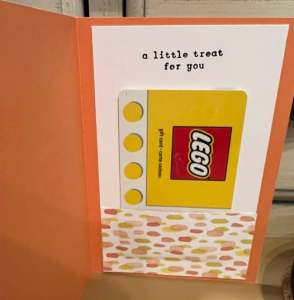
2. Glue the DSP strip to the bottom but be sure to leave the top unglued. I used tear n tape: one strip on the left side, one strip on the right side, and one across the bottom edge. This will form a small pocket in which you can place a gift card or cash!
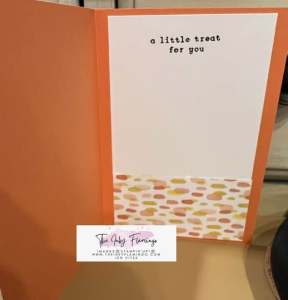
3. . Adhere the white cardstock to the inside of your card base.
SUPPLIES I USED
Feel free to use these same supplies or experiment with your own!
timid tiger cardstock
basic white cardstock
Sweet Jar stamp set
Stylish Shapes dies
Florals in Bloom DSP
black memento ink
All these supplies are available in my online shop & both the timid tiger cardstock & florals in bloom DSP is currently 15% off through the end of August
This is card five in the Create Easy Birthday Card series. I’d love to see the cards you create! Reply to this post or post your pics to social media 😉
Thanks for following along!
Jen


Leave a comment