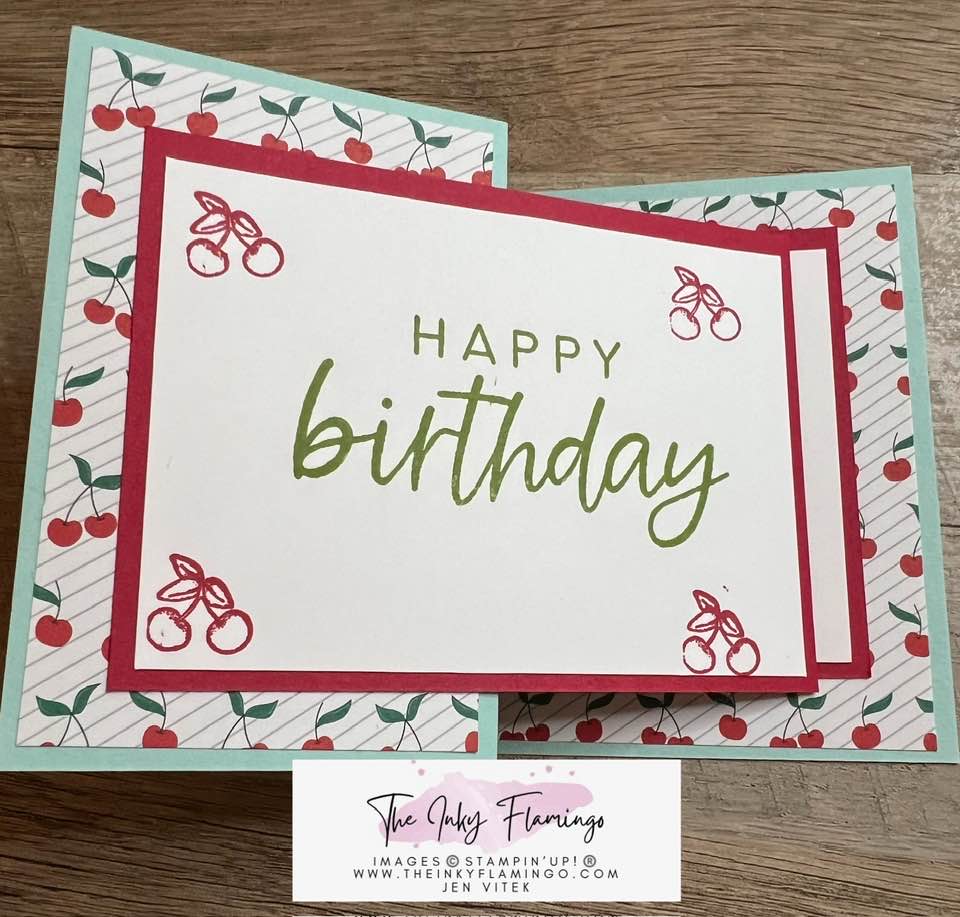
Hi friends! Today’s fun fold is a variation of the Half Side Gate card found here. I’m calling it the Double Rectangle fun fold; I don’t know if it has another name, but this one seems to fit. 😉
Supplies Needed:
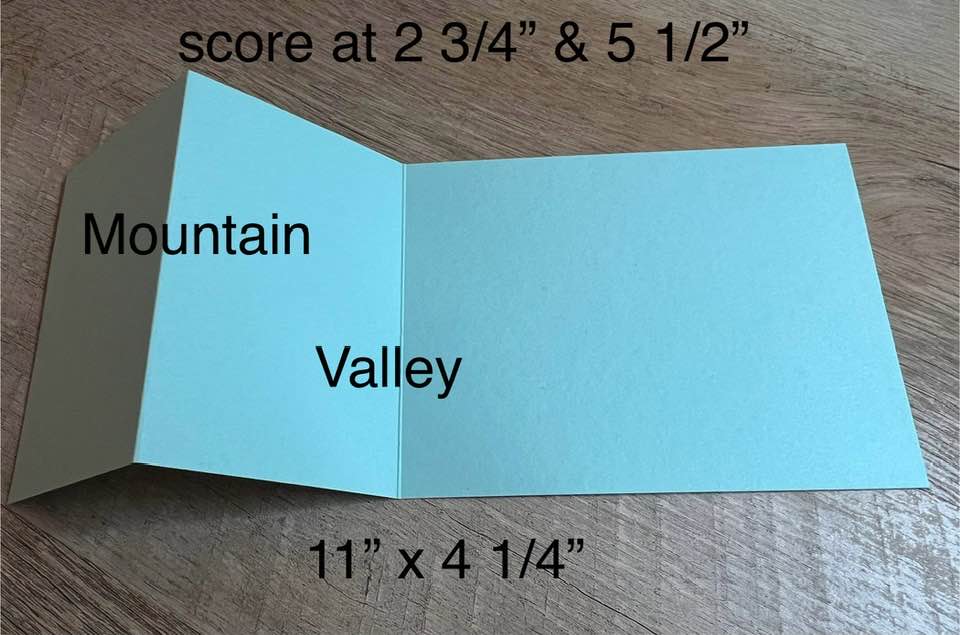
- 4 1/4″ x 11″ cardstock
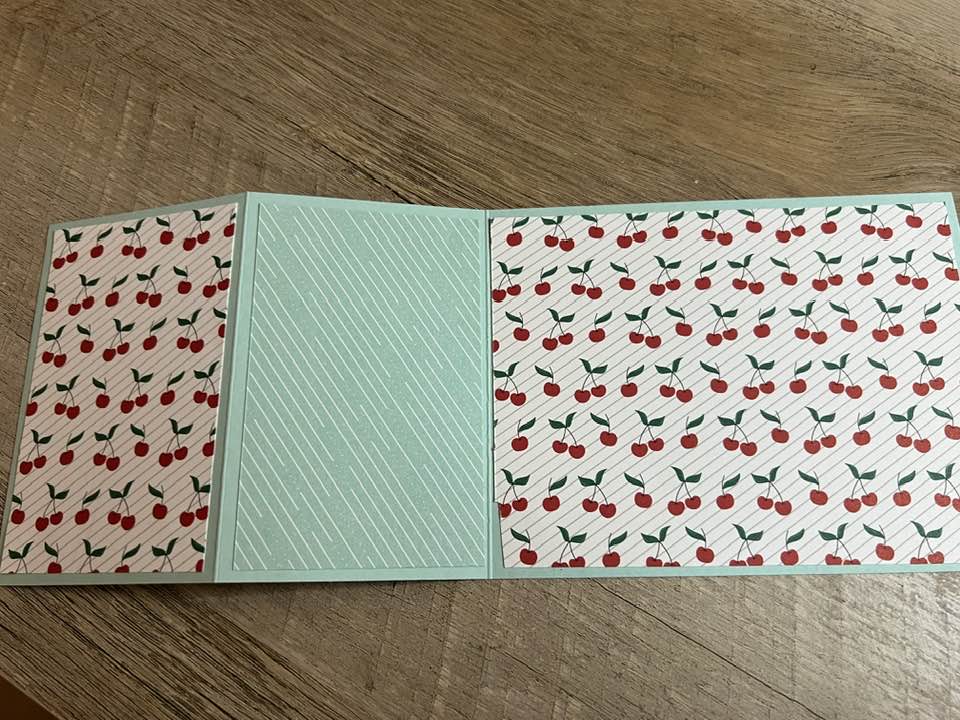
- 2 pieces of DSP that measure 2 1/2″ x 4″
- 1 piece of DSP that measures 4″ x 5 1/4″
note: one of the pieces of DSP should have a different pattern. On my card I chose to make one of the smaller pieces a different pattern, but it truly doesn’t matter which piece you choose to be different!
- 2 pieces of cardstock that matches your DSP or card base, cut to 4 1/2″ x 3″
- 2 pieces of white cardstock cut to 4 1/4″ x 3″
- post it note tape or post it notes
- stamps, ink, adhesive, paper trimmer with scoring blade
Here’s what the card looks like:
Instructions:
Score your 4 1/4″ x 11″ cardstock at 2 3/4″ and 5 1/2″. The 2 3/4″ fold should be a mountain orientation and the 5 1/2″ fold should be a valley fold. See picture for illustration:
Attach your three pieces of DSP to your card base.
Take one piece of your cardstock that measures 4 1/2″ 3″, center it on the front of your card, apply adhesive to only the left side of your cardstock (so you don’t glue your card shut), and attach the cardstock.
Open your card, take the second piece of 4 1/2″ x 3″ cardstock, and center it on the inside of your card (over the bigger piece of DSP). Close your card. Do the rectangles line up? If not, push the bottom rectangle in place, then put post it note tape or post it notes along the edge and top of your rectangle.
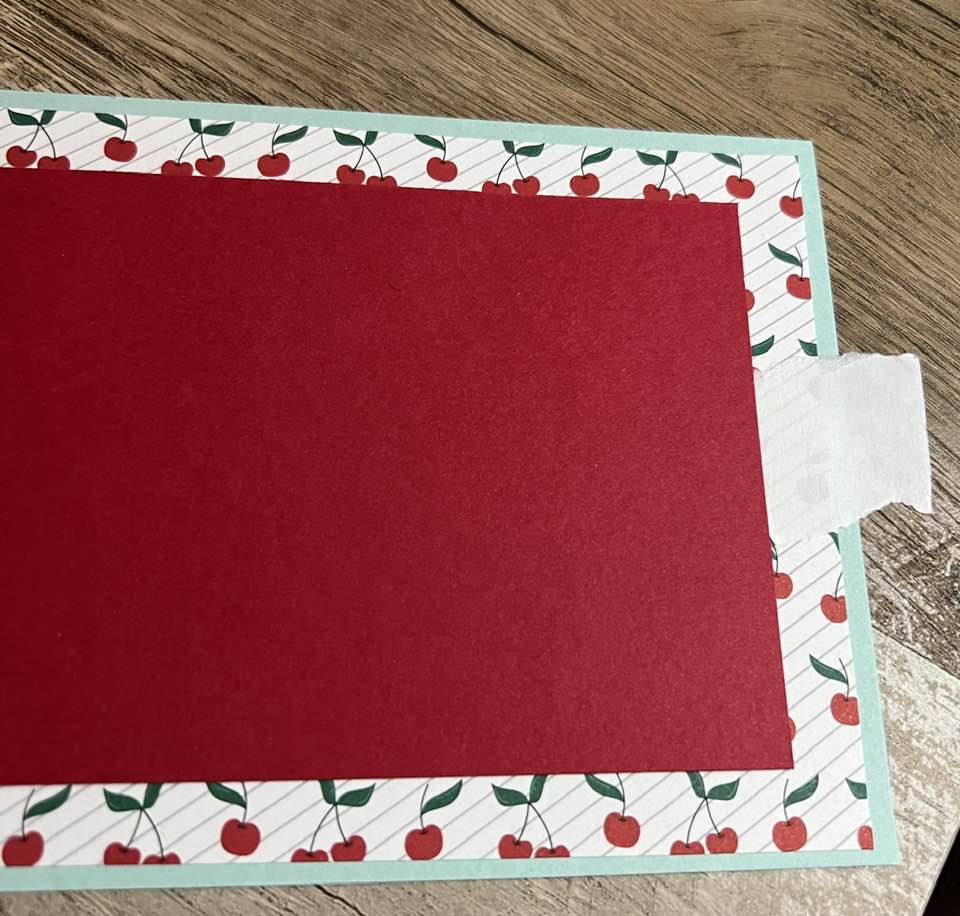
You can see in the picture it only shows tape on the side, but you should also put it along the top to ensure correct positioning of the rectangle.
Apply adhesive to the back of your rectangle, then line it up between your pieces of post it tape and adhere. Remove the tape.
Stamp/decorate your white cardstock with your greetings, and then attach one to the front of the card inside your cardstock rectangle, and the other piece should go on the inside of your card.

I hope you give this card a try!
Happy Creating!
Jen


Leave a comment