Hello! This is the first in a series of different fun fold cards that I tend to create in my card making. Check out the fun folds tab on the main page as I add a new one every week. All measurements are in inches.
Supplies Needed:
- 8.5 x 11 sheet of colored cardstock (should match your patterned paper)
- 6 x 6 piece of white cardstock
- 6 x 6 sheet of patterned paper
- stamps, inkpads, paper trimmer tool with scoring blade, adhesive
- optional: die cuts and die cutting machine
Instructions:
- Cut your 8 .5 x 11 sheet of colored cardstock in half at 4.25 inches. You only need one; set aside the second piece to make another card.
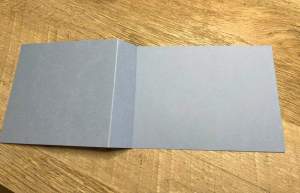
- Score at 5.5 and 6.5; fold in half at the 5.5 score line and then fold the 6.5 score line back in the opposite direction. It will look like this:
3. Place your adhesive on the spine (the 1 inch gap between score lines)
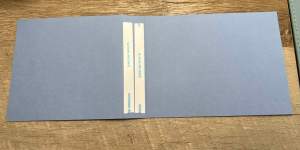
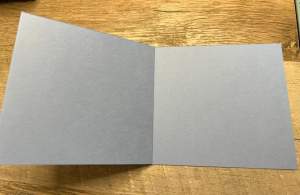
4. If using this type of tape, pull the backing off and fold the left side of your card onto your right. This will form your card into a “book”:
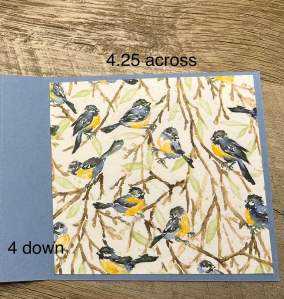
5. Cut your 6 x 6 patterned paper down to 4.25 x 4. Center this on your card front and fasten down.
6. From your remaining patterned paper, cut a piece that measures 0 .75 x 4. Center this on your spine and adhere this to your spine, lining up the edges.

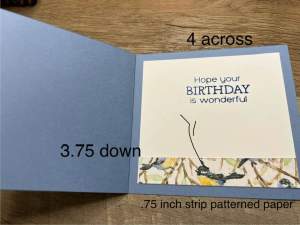
7. Using your white card stock, cut a piece that measures 4 x 3.75. Set aside. This will be used for the inside of your card. Use the excess white cardstock to stamp your sentiment and cut out. I used mini dimensionals to pop up my greeting:

8. Stamp your message onto your piece of 4 x 3.75 white cardstock. Do not adhere the cardstock prior to stamping! It’s so easy to make a mistake while stamping, and if it’s already stuck to your card base, it’s hard to fix, and you may need to start over. Ask me how I know 😁😁 I had extra small pieces of this paper available to add a .75 inch strip to the bottom of my card but this is optional.
Notes:
- This is one of my favorite fun folds to make. The card comes together easily, which makes it a great choice if you have a lot of the same cards to make, such as thank you cards.
- You can use ribbon on the spine instead of the small piece of patterned paper. I recommend 5/8″ or 3/4″ ribbon. In my next fun fold post, I will be doing a variation of this card which uses ribbon on the spine, and I will post a link here so you can check it out.
- You can cut a ribbon tag without a die cut machine. Starting at the left corner, make a cut until you reach the middle; this cut should be approximately .75 inches long. Do the same for the right corner, and cut towards the middle until you reach the other cut. I was skeptical the first time I tried it, but it works surprisingly well.
Let me know what you think about this fun fold! I’d love to see what you create!
Jen


Leave a comment