Hi friends! I’m back with a new technique I want to share with you! It’s called the bokeh technique, and this refers to a group of blurred images (typically circles) that form the background. Grab your supplies from the list below and create along with me!
Supplies Needed:
- 2-3 inkpads in similar shades of the same color (for ex: all blues, all reds, all greens, etc)
- 4″ x 5 1/4″ piece of cardstock that matches your lightest color
- piece of acetate (window sheets) or thick cardstock
- circle dies or punches
- white craft ink
- blending brushes & sponge daubers
Instructions:
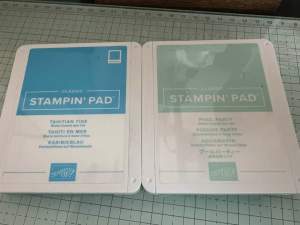
- Decide what color family you’d like to create your card from. i used two colors: Pool Party, which I love, and Tahitian Tide (retired but was also a past favorite). These were the only two lighter shades in the blue family I have, so that’s why I chose two. If I had Balmy Blue, I would have made that my third color.
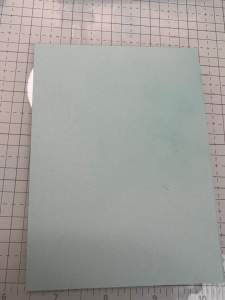
2. Take your lightest shade of color, and cut a piece of matching cardstock that measures 4″ x 5 1/4″.
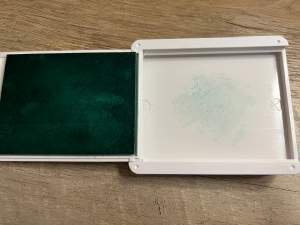
3. Dip your blending brush into your lightest ink, then dab it onto a scrap piece of paper to remove excess ink. This should be done every time you dip your brush directly onto the inkpad. You can also dab it onto a glass mat if you have one, or simply onto the inside of the stamp case, as shown below. The nice thing about using a glass mat or the inside of the stamp case is that if you need a little more ink, you can dip your brush into it again, minimizing waste. If you dab off on a porous material, such as paper, it will absorb all the ink.
4. Leave the bottom third of your cardstock untouched, and starting with the middle section, apply the color in a circular motion until you work your way up to the top. Switch to your next color (with a new blending brush), dab off, and repeat the process. If you are using a third color, it should be your darkest shade, and start at the top of the card and work down to the middle. If there are inconsistencies in the color, it’s fine! It’s supposed to look that way.
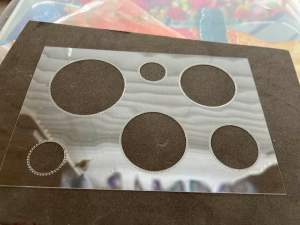
5. Make your stencil: Use a piece of acetate or cardstock, and with circle dies or punches, create several holes of different sizes, leaving room between the circles. You know the plastic backing that new stamps are mounted on? That’s what I used.
6. Take a sponge dauber, dip it into the corner of the inkpad, and using your stencil, apply in a circular motion the white ink to your cardstock. You do not need to dab off with this. Vary the size of the circles, and overlap some of them. Feel free to move the stencil around and put the circles where you want.
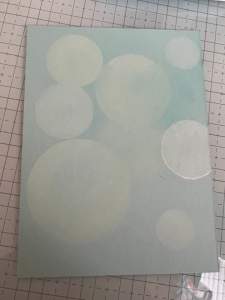
7. Pick a couple circles to highlight. Place your stencil back over the circle, and reapply white ink. This gives the appearance of making them look closer, which adds dimension to your card front.

You can then attach this to your card front and finish the card with a sentiment, embellishments and whatever else you’d like to add! Here’s my completed card:

I hope you enjoyed this technique! If you want a brighter feel, try using white cardstock instead of colored cardstock to apply your ink to.
If you try this technique, I’d love to hear what you think. Drop a reply or find me on social media.
Happy creating!
Jen
PS! If you’re looking to pick up card making supplies, we are in the middle of free shipping right now! This only happens a few times each year so be sure to stock up while you can! Click the pic below to access my shop:


Leave a comment