
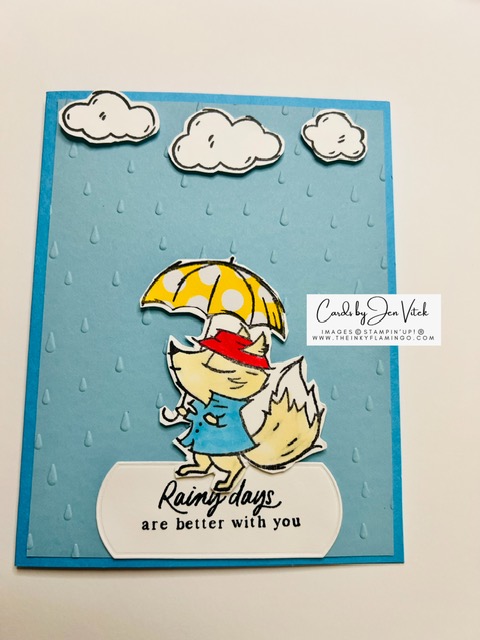
Hi friends! This week’s card design is fun, and it allows you to use up your scrap pieces of DSP (decorative paper). It’s called Stamped Paper Piecing, and it adds interest, texture, and pattern to your stamped images. Read more to find out how to do this technique.
The Technique
You’ll want to identify a stamp in your collection that will work well with paper piecing. Pass on the super detailed stamps; you’ll want one with open areas, such as flowers, clothing or shapes.
Start by stamping your image twice: on white cardstock and again on a small piece of DSP. Look for DSP that has smaller patterns in the color you want. You can then cut out the stamped portion and adhere it back onto your original image for a layered, custom look. For my card today, I’m using yellow dotted paper for the umbrella.

Additional Coloring
You can use Stampin’ Blends, colored pencils, watercolor pencils or soft pastels to add color to the rest of your image. In my tutorial, I instruct you to color the spaces after you glue down the DSP piece, but if you feel it might be difficult to color in certain areas with the DSP there, you can always color it first, then adhere the DSP. For my image I used Stampin’ Blends in the colors light crumb cake, light real red, and light tahitian tide (a retired color).

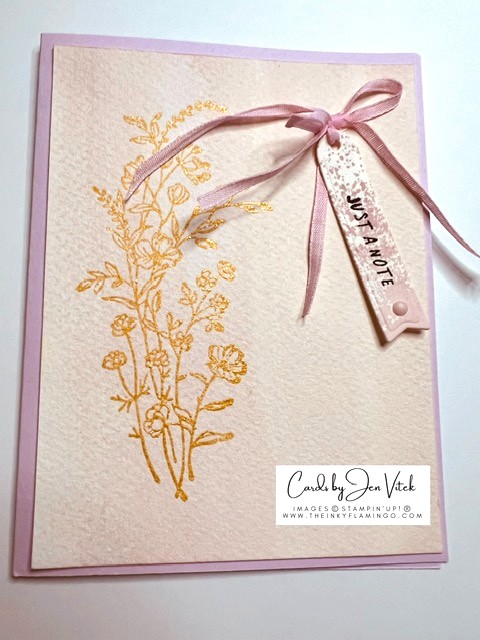
Finished Card

Download the Free Tutorial
Additional tips and color combos, and step-by-step instructions are available in the free tutorial; click the link below to download it to your device.
I hope you enjoyed this technique! It brings me back to the days of cutting and pasting in elementary school!
Happy Stamping!
Jen

Leave a Reply