
Do you mail or hand out Halloween cards? I don’t think it’s typically a holiday that many people think of when they think greeting cards! Even if you have no plans for mailing, sometimes it’s fun just to create for the sake of having fun and relaxing.
What if you don’t have a dedicated Halloween stamp set to use? I want to show you a way you can create your own card without needing one, just by using the supplies you have. I’ll pop the supplies I used below, but feel free to substitute with what you have. All the stamps I used for my card were ones I had in my collection, and the tree stamp was a wood mounted stamp I haven’t used in many years. Full disclosure: I used a greeting stamp from a set that is part Autumn, part Halloween. This is the “Happy Halloween” greeting you see on the card, but if you don’t have a similar stamp, you can print one off, or use rub-ons or stickers.

Supplies:
- orange card base 5.5″ x 8.5″, scored at 4.25″
- white cardstock for front and inside panel, and greeting tag
- tree, house, birds (or bat) stamps
- background splatter or dots stamp
- greeting stamp
- blending brush
- scrap paper for making moon template
- 2.25″ circle die
- black, orange and yellow inks
- light orange alcohol marker
- ribbon
For the front, cut a piece of white cardstock to 4″ x 5 1/4″. Take a piece of scrap paper and using your circle die, cut out a circle. Remove the circle and place the remaining paper where you want your moon to be. Tape down with removable tape or sticky notes, and use your blending brush to color in the circle with yellow ink.
Tip: If you want to add a little orange to your moon, add a little orange to your blending brush and then blend the ink on to your greeting tag. There will still be a bit of orange left on your brush. Use that to pick up some yellow ink, and then blend in a circular motion to create your moon.
Next, stamp your trees with black ink. Trees with a few leaves would be fine; in my experience, most trees do not lose all their leaves by Halloween. Leave room for your house.
I stamped my house in black ink, and left off part of the roof (it was a 2-part image). It looks more Halloween-ish without it’s full roof! If you have a haunted house stamp go ahead and use that! I applied a light orange alcohol marker to color in around the windows and door to give it more of a spooky look.
Using the background stamp and black ink, stamp around the bottom of the trees and around the house. This creates visual interest and draws the eye downward.
I added birds to my night sky, but if you have a bat stamp, you could use that for a more spooky feel.
Wrap the ribbon around the card panel and tie a bow in front. Glue this entire piece to the front of your card base.
Stamp your greeting onto your tag, and adhere to your ribbon.
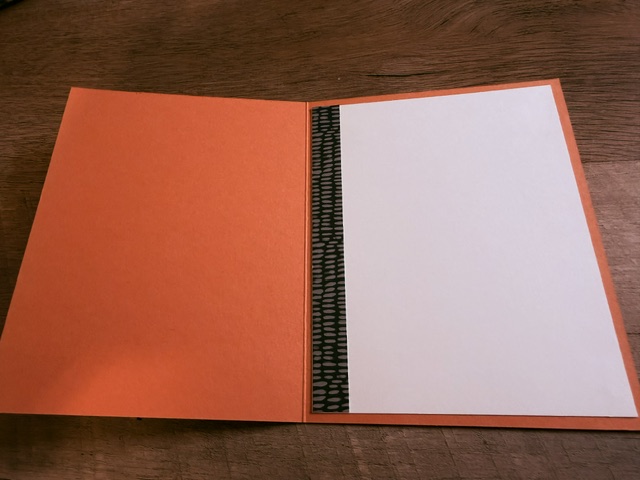
For the inside, cut a piece of white cardstock to 4″ x 5 1/4″. I attached a 1/2″ strip of patterned paper to the left side, but this is optional. You could also stamp a Halloween image in one corner. I left the sentiment off, but if you have a Halloween themed saying, you could stamp it on. Center on the inside of your card base and glue down.
Do you decorate your envelopes? I always add matching decorative paper to my envelope flap.

I hope this has inspired you to go through your stash and create a Halloween card! I’d love to see what you create–post a comment so we can all see!
Happy Creating!
Jen
Want more inspiration? Join my newsletter here



Leave a Reply